
Microsoft Azure
Our Microsoft Azure integration enables you to connect to one or more Azure accounts, providing better network coverage and access to additional information. At this time, we use this integration to discover your registered domain names, your hosted DNS zones and the associated name records, and any cloud resources. This page explains how to connect an Azure account to your Certificates account.
1. Create an Azure Service Principal
Section titled “1. Create an Azure Service Principal”The first step is to create a service principal with a client secret. This can be done using the Azure web interface.
- Sign in to the Azure portal using your Azure account.
- Select Azure Active Directory > App registrations > New registration.
- Provide a name for the app. Use something descriptive like
CertificatesIntegration. - Leave the other options as their defaults and click Register. The app registration will be created and the Overview page displayed.
- Copy the Client ID and the Tenant ID. You will need to supply these to Certificates later.
- To generate a client secret, select the Certificates & secrets page and then click New client secret.
- Provide a description for the secret. Perhaps
CertificatesIntegrationagain. Set the expiry time (we recommend years) then click Add. - The value of the secret will then display. Copy and save this value in another location, because you can’t retrieve it later. You will also need to provide this secret to Certificates later.
2. Decide which role to use
Section titled “2. Decide which role to use”Now, decide which role you would like to assign to the service principal. You have two options:
- Use the Reader role (preferred) — this is a read-only Azure system role that allows Certificates to view all resources in the account. If you choose this option you won’t need to reconfigure your integrations later when we expand our integration capabilities. More information about the Reader role and the permissions it gives can be found here.
- Use a custom role — with a custom role, you can fine-tune access to only the resources you wish us to integrate with. However, doing so requires additional time and effort. You will also need to update your policies later to take advantage of our new features.
If using the Azure Reader role
Section titled “If using the Azure Reader role”- Go to Subscriptions, click on the Subscription name, then Access control (IAM).
- Click on +Add then Add role assignment.
- In Role, select Reader from the drop-down.
- In Select, find and pick
CertificatesIntegration— it will appear in Selected members. - Click Save and the new role assignment will appear.
If using an Azure Custom Role
Section titled “If using an Azure Custom Role”You will need to use a command line tool named azure-cli to create a custom role.
-
Install azure-cli if you don’t already have it installed.
-
Run the following command to log in to your Azure account:
Terminal window az login -
Obtain the subscription ID for the app you’ve created. You can see a list of your accounts by running the command below and selecting the
idfield from the relevant account:Terminal window az account list -
Create a role definition file named
CertificatesIntegrationAzure.defcontaining the following content, replacingSUBSCRIPTION_IDwith the value obtained in the previous step:{"Name": "CertificatesIntegration","IsCustom": true,"Description": "Allows Certificates restricted access to your account","Actions": ["Microsoft.DomainRegistration/domains/read","Microsoft.Network/dnszones/read","Microsoft.Network/dnszones/*/read","Microsoft.Network/dnszones/*/recordsets/read"],"AssignableScopes": ["/subscriptions/SUBSCRIPTION_ID"]} -
Now run the following command to create the role:
Terminal window az role definition create --role-definition ./CertificatesIntegrationAzure.def
3. Assign the role to the Service Principal
Section titled “3. Assign the role to the Service Principal”You need to hook up the role that you chose to create to the service principal that you created. This can be done from the Azure web portal as follows:
- Navigate to your subscription.
- Navigate through Access Control (IAM) → Role Assignments → Add → Add Role Assignment.
- Select the role and service principals which you created and click Save.
4. Configure Certificates
Section titled “4. Configure Certificates”Finally you need to give some details to Certificates.
- Open the Integrations page.
- Click Add New Integration, and select Azure from the dropdown.
- Enter a unique name to identify the integration and optionally enter something into the Reference field, if you want a way of associating the integration with a particular account or similar.
- Enter the Tenant ID, Client ID and Secret values into the form.
- Click Save Integration. To see if things have been setup correctly, click Test in the integration’s actions in the table. If it succeeds, then ensure the integration is enabled and enable it otherwise using the row actions. Your new integration is now active and will run shortly.
Operation of the integration
Section titled “Operation of the integration”Once the integration is set up, you must then:
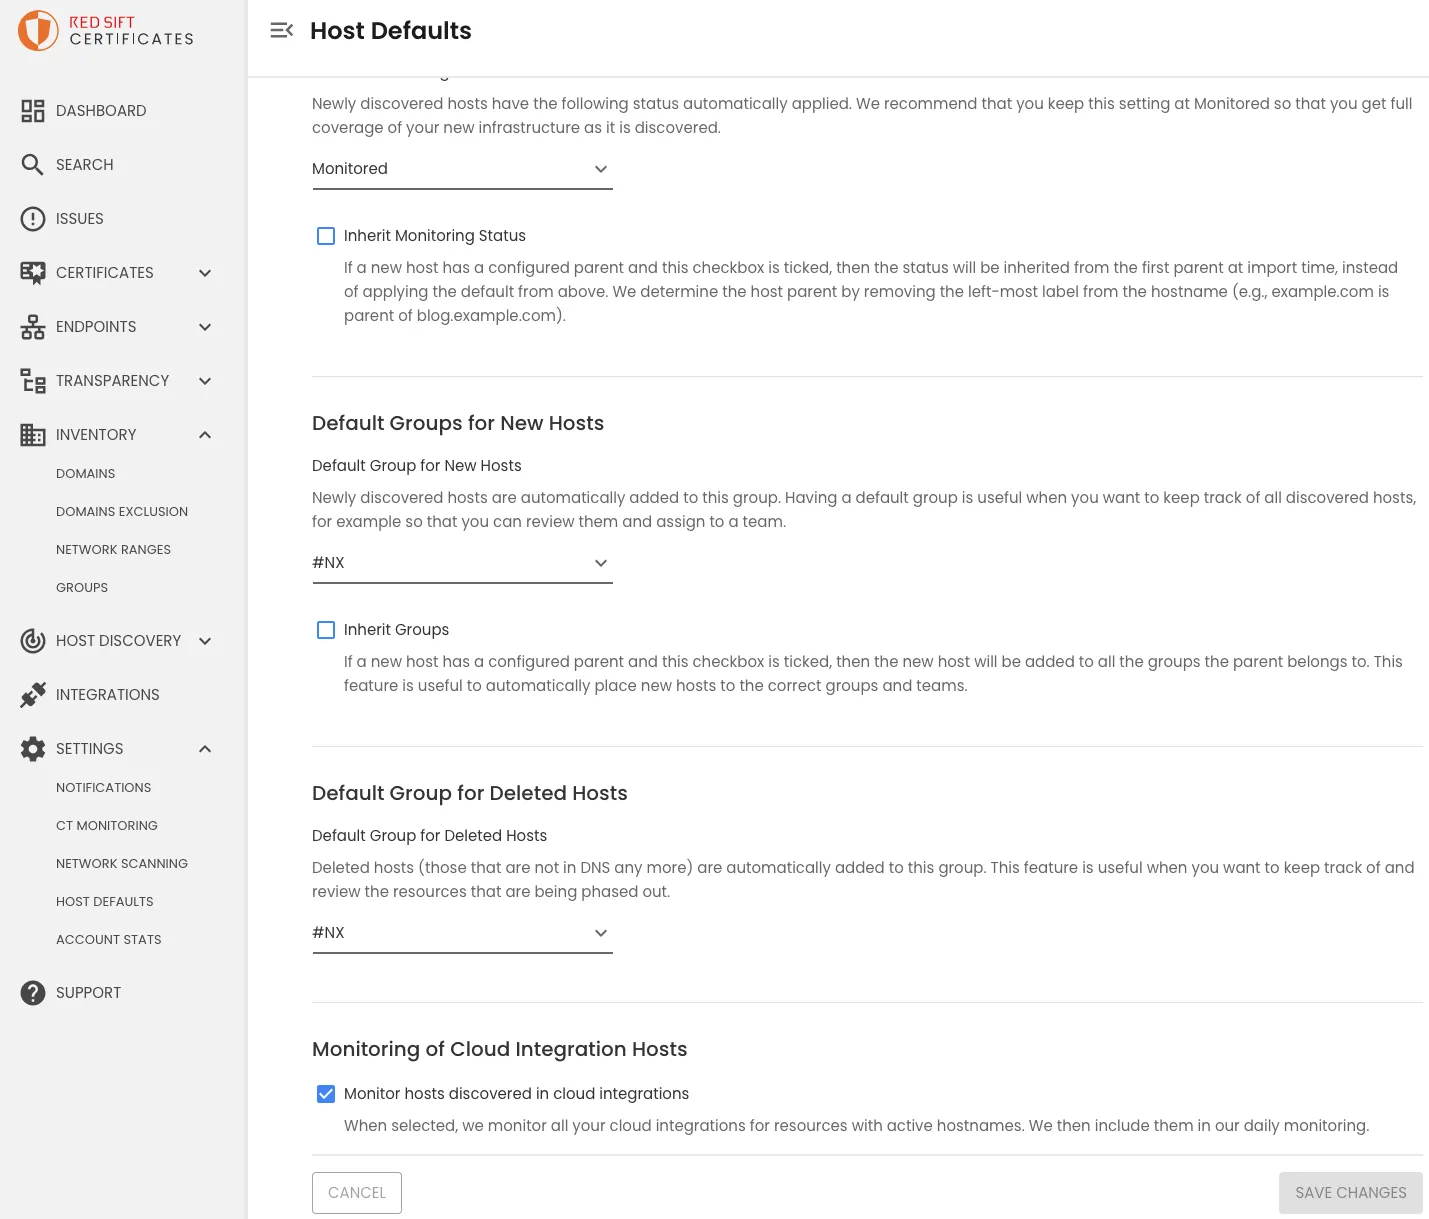
- Enable monitoring of cloud integration hosts. Visit the Host Defaults page under settings, tick “Monitor hosts discovered in cloud integrations”.
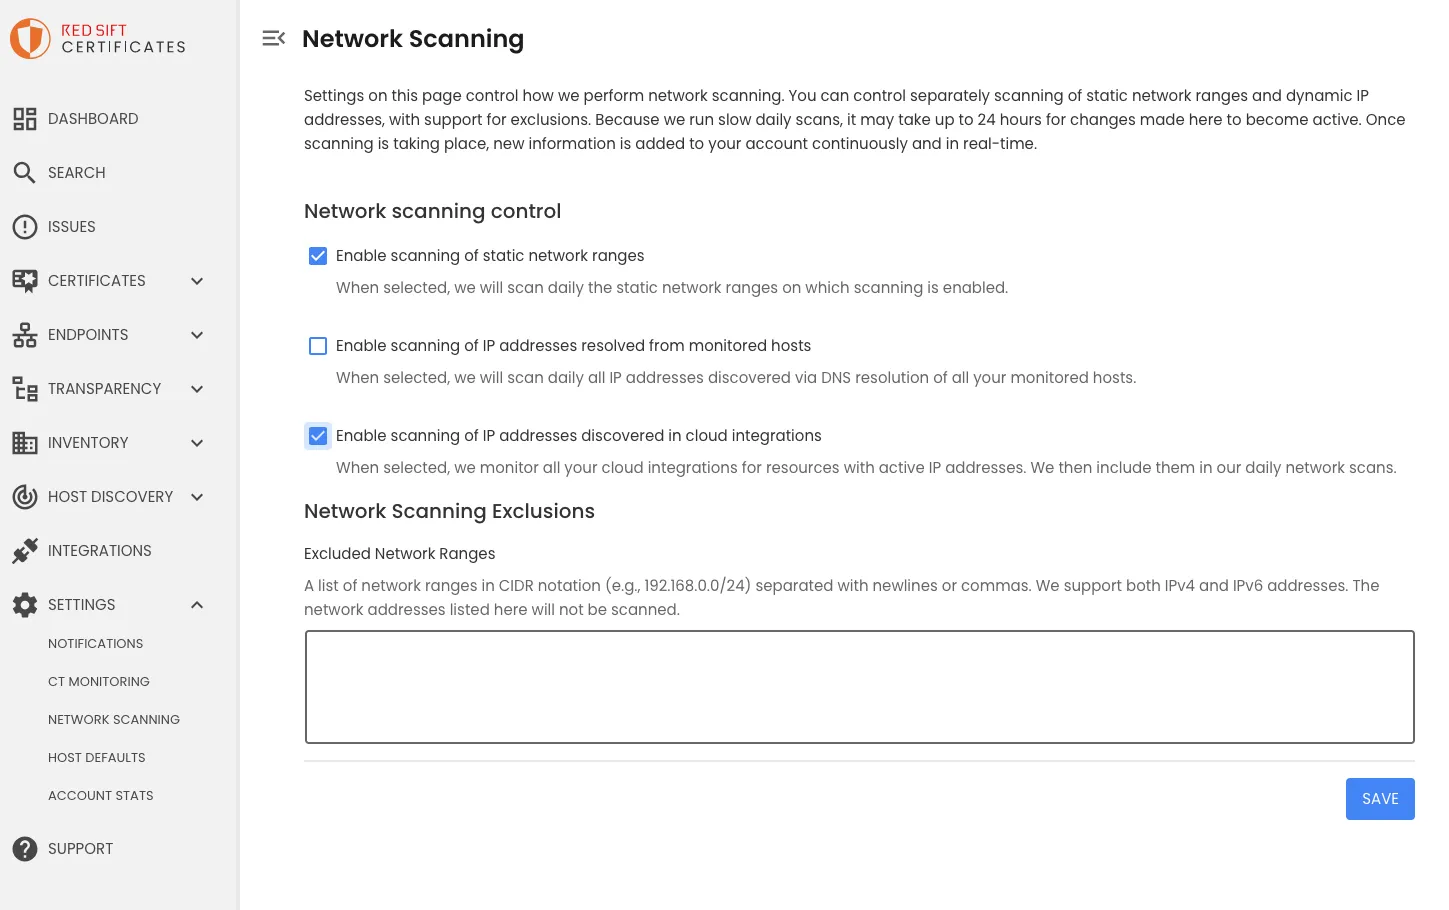
- Enable scanning of IP addresses discovered in cloud integrations. Visit Network Scanning under settings, tick “Enable scanning of IP addresses discovered in cloud integrations”.
Our discovery process will connect to your Azure accounts once a day to:
- Import cloud resources.
- Import new domains. Discovered domains will then appear on the Domains page under Inventory. You can use the controls on this page to import the discoveries into your inventory, optionally enabling monitoring.
- Import DNS zones. If any of your monitored domain names have DNS servers in Azure, we will automatically sync the hosts we discover and add them to your inventory.