NS1
Our NS1 integration allows you to discover DNS zones in your NS1 account, then add the hosts in these zones to your Hardenize inventory and begin monitoring them automatically. This synchronization updates every day, so new domains added to NS1 will be quickly discovered by Certificates.
Information required to configure the integration
To configure the integration in Certificates, the following information is needed from your NS1 account. Please login into your NS1 Customer Portal, click on your user name at the top-right hand side of the page, then click 'Account Settings'
- Make a note of your Customer ID.
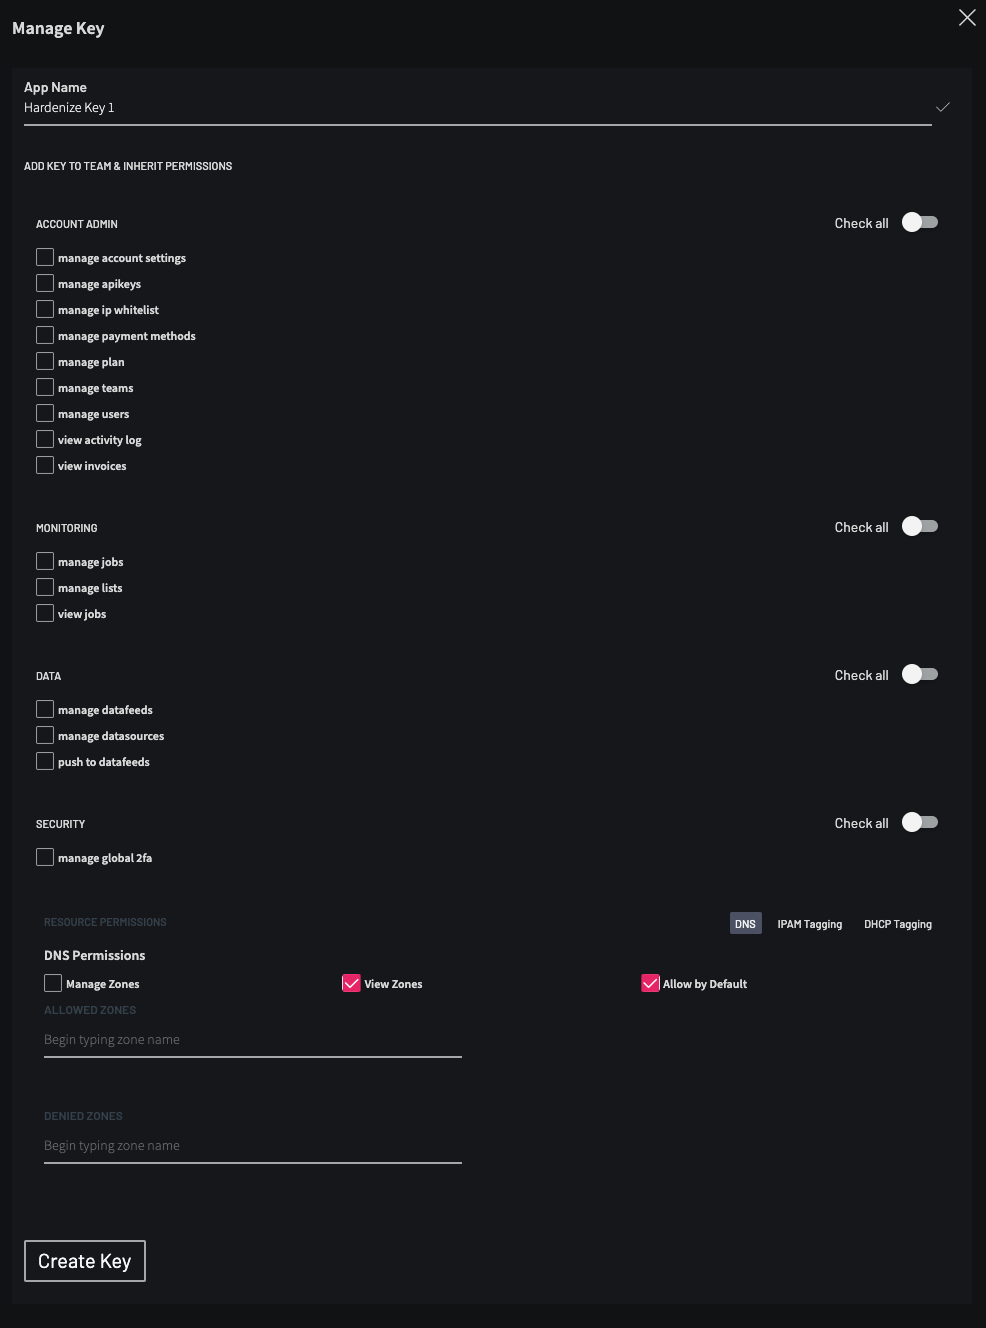
- Next, create an API key. Click on 'API Keys'. Click 'Add Key' at the bottom of that page.
- Toggle the 'Check all' button against 'Account Admin', 'Monitoring', 'Data', and 'Security' as these permissions are not required.
- Under 'DNS Permissions', tick 'View Zones'. You may also wish to tick 'Allow by Default'. This will give Certificates access to new zones that are created after the API key is created.
- If you would like to restrict Certificates to particular zones, then add 'Allowed Zones' and 'Denied Zones'.
- If you would like to restrict access to this key only to the Hardenize outbound addresses, then add the address to 'Manage IP Whitelist for this key'. The Hardenize outbound addresses can be found here. You can add multiple IP addresses using the return or tab key.
- If you would like to ignore other NS1 whitelists for this integration, tick 'Apply this IP Whitelist Exclusively'.
- When finished, click 'Create Key'
- To view the API key that is created, click on the exclamation icon. Copy this or make a note of it.
- You can also edit the API key or delete it here later if necessary.
Configuring the integration in Certificates
Once you have all of the information required, you can configure the integration in Certificates. Go to Integrations, then:
- Click 'Add New Integration' and select NS1.
- Then enter:
- 'Name' - a mandatory field. The name you would like to use for this integration. Use something that will make sense to you and your team.
- 'NS1 Customer ID' - a mandatory field. The Customer ID that you made a note of in the previous step.
- 'Tags' - this is optional. When this feature is used, then Hardenize will tag any resources that we discover when running the integration.
- 'API KEY' - a mandatory field. This is the API key created in the previous step.
- Click "Save Integration".
- Once saved, click "Test" in the integration's actions in the table. If it succeeds, then ensure the integration is enabled and enable it otherwise using the row actions. Your new integration is now active and will run shortly.
- If we have been unable to connect, then the error 'Invalid credentials' will be shown at the top right-hand side of the page.
Adding discovered domains to your Certificates inventory
Rather than immediately adding domains from integrations to your Certificates inventory, we give you the opportunity to review them first. This means you can check that they should be added to your Certificates inventory, and if so whether the domain should be monitored or not.
- The domains that have been discovered in your CSC account can be reviewed in Discovered Hosts. They will be labeled in 'Match Reason' as 'Integration - Name', with the name being what you called the integration when you added it.
- If you would like to add a domain to the Certificates inventory, then select it, click 'Update n hosts', then mark them as 'Own'. This tells Certificates that you own those domains. They will be added to your inventory, and monitoring will begin immediately.
- If you would prefer to delete a discovered domain, then pick 'Delete' instead of 'Own'.
Common issues
If the integration fails then check that the:
- allowed IP addresses are correct.
- API key has been correctly copied.
- permissions match what we require.
Updated 6 months ago